How to enter a paycheck in AceMoney
A paycheck is a document issued by an employer to pay an employee for services rendered. In nowadays the physical paycheck has been replaced by electronic direct deposit to bank accounts.
Usually a paycheck shows gross amount paid by the employer, tax deductions paid to the tax authorities on behalf of the employee, contributions to the pension accounts such as 401k, before and after tax deductions, for instance health and dental insurance, short and long term disability insurance, contributions to the employer sponsored savings plans such as Employee Stock Purchase Plan (ESPP).
In a nutshell, the net amount deposited to your account is calculated as:
Net amount = Gross amount – Tax withholdings – Insurance payments – Pension contributions
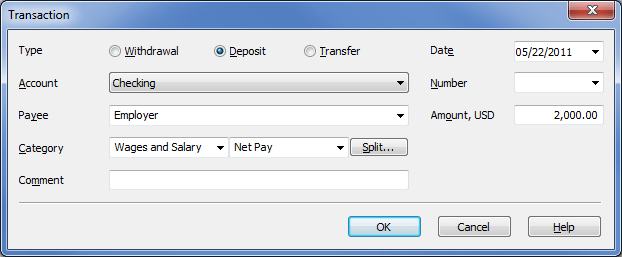
There are several ways of dealing with paychecks in AceMoney. The easiest solution is a simple deposit transactions of your net income (2000.00 in this example) with the payee field set to the name of your employer and “Wages and Salary:Net Pay” as a category:
This approach is fine as long as you don’t have a 401k plan, don’t want to track taxes withheld by your employer or track before and after tax payments. If this is not the case, you have to record a paycheck as a split transaction.
Here is a basic account structure required to track compete paycheck information, including deposits to 401k account and Employee Stock Purchase Plan:
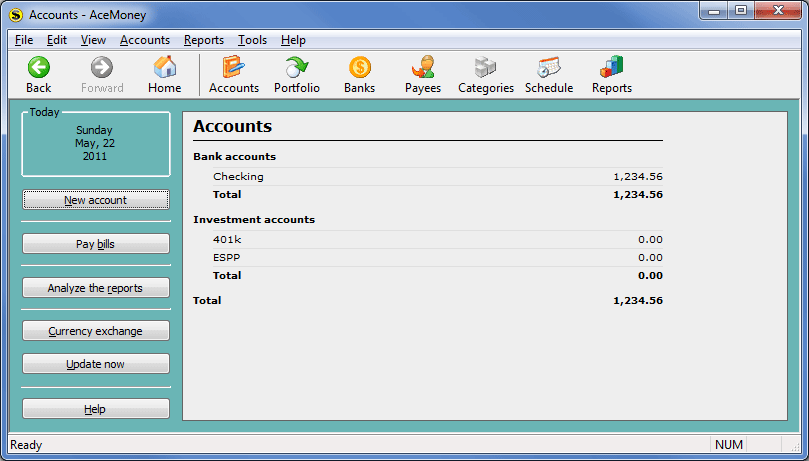
Checking account here represents your primary bank account used by your employer for direct deposit, or this is an account where you deposit your paycheck manually. One way or another, it is an account that gets your net pay deposited every so often. Accounts 401k and ESPP represent your real 401k and Employer Stock Purchase Plan accounts provided by your employer. If your employer does not provide them, that’s fine, just ignore anything related to these accounts below, only pay attention to the tax related withholdings and other deductions.
Now it’s time to add a recurring deposit representing a paycheck. Since every paycheck is a complex transaction, you definitely don’t want to enter the same split items over and over again. Instead, let’s record it on the schedule page as a recurring deposit and define the split items only once.
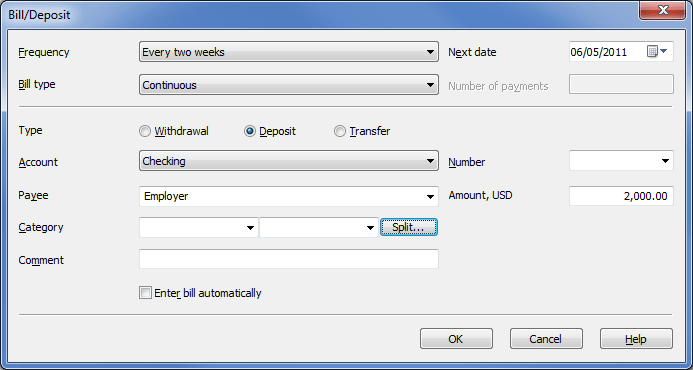
1. Click on the Schedule button in a toolbar and then click on Add bill/deposit. Set Frequency to whatever is used by your employer, most companies in North America deposit paychecks either two times a month, or every two weeks, but AceMoney provides a plenty of options.
2. Set the Next date field to the deposit day. If you want to record a paycheck for the past date, that’s fine, set that date there.
3. Bill Type obviously is a Deposit unless you are an employer writing a paycheck to somebody else, but then this article is not applicable to you.
4. Select your direct or manual deposit bank account in the Account drop down list.
5. Pick your employer as a payee. If it is not in the Payee drop down list, you can just type it in the payee field and AceMoney will create it automatically for you.
6. Enter the net amount to the Amount field. That amount should be exactly the same as the amount deposited to your bank account. This is how the dialog looks like:
7. This is when the fun part begins. Click the Split button to enter all details.
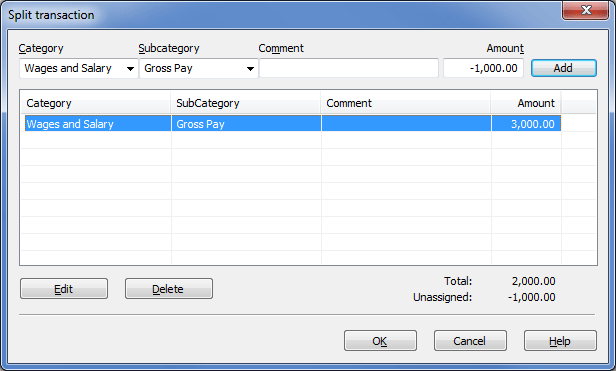
8. Start with the gross amount, in our example it is 3000.00. Pick “Wages and Salary” in the category dropdown list, select “Gross Pay” as a subcategory and enter 3000.00 to the amount field. Note that the gross amount usually is the only positive number in your paycheck, everything else is recorded as negative numbers because these values decrease the overall income. Click the Add button. You’ll see something like this:
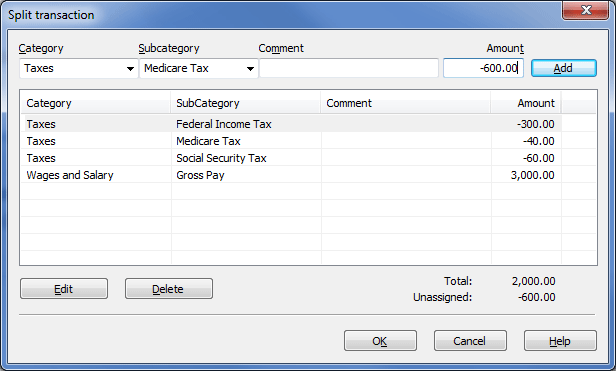
9. Now add tax withholdings. Every country has its own set of taxes. In case of the United States the vast majority of employers withdrawal at least three: Federal Income tax, Social Security tax and Medicare tax. Enter them the same way as the gross amount, but use negative numbers. You should see this picture after you are done:
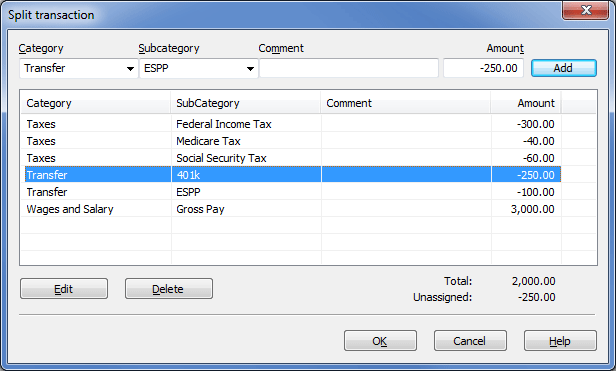
10. The next step is pension or savings account contributions. If you are not contributing to the pension plans, you can skip the rest of this paragraph. You already should have created accounts for 401k plan and ESPP. Pick Transfer as a category and an account corresponding to your 401k plan in the subcategory dropdown list. Enter the amount of contribution as a negative value and click on Add to add a contribution. If you contribute to ESPP, repeat the same procedure to record ESPP contribution. This is how the updated dialog will look now:
11. Finally, let’s add insurance payments. If you are lucky to work for a company where employer pays 100% of your insurance, skip this step, otherwise add insurance withholdings as negative amounts categoriezed as “Insurance:Health” or “Insurance:Dental”.
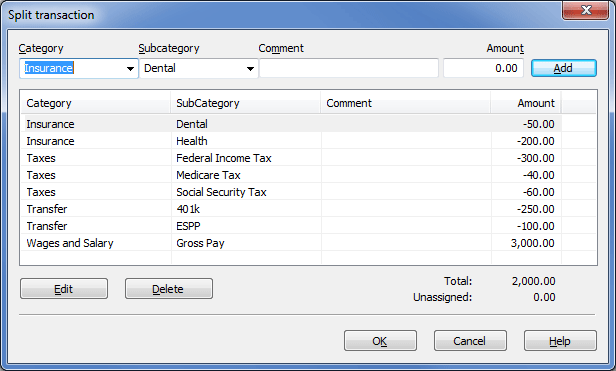
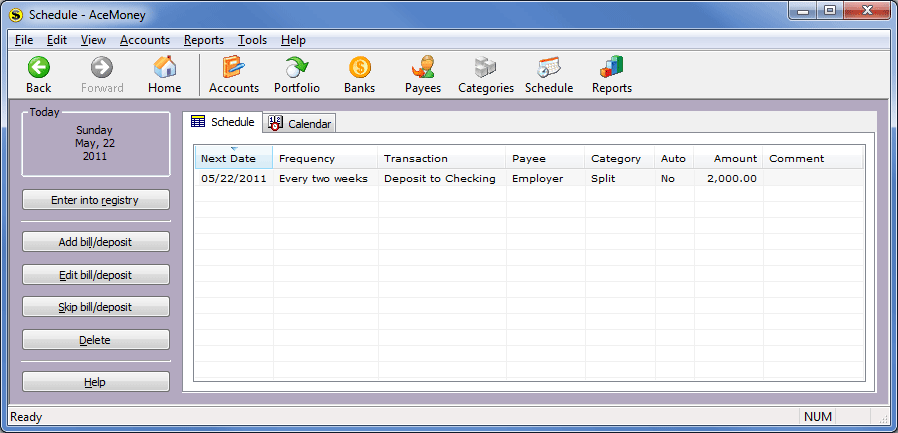
12. At this point the dialog has all the items and the Unassigned box should say 0.00. If it is not zero, then you’ve missed something or made a mistake in one of the amounts. Click OK button to close the Split dialog. Bill/Deposit dialog now also can be closed, click on the OK button. You will get back to the schedule page and it will have your scheduled deposit in the table:
13. Now let’s enter a paycheck as a transaction to the registry. This probably is the easiest step of this tutorial. Make sure the deposit is selected in the schedule table, click on the Enter into registry button, AceMoney will present you a transaction dialog with all your data. Click OK to close it. That’s it, you’ve recorded a paycheck. Now let’s check if the balances on the accounts correctly went up. Click on the Accounts button in the toolbar to see this:
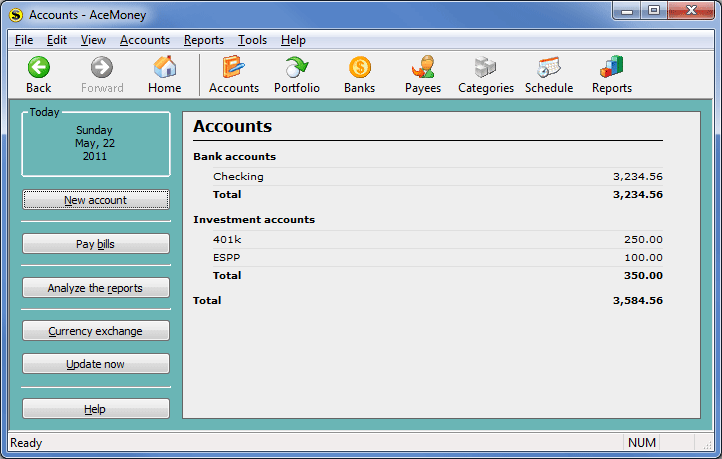
Checking account balance was increased by 2000.00 and this matches your bank statement.
401k account balance is 250. This account does not yet have any investments associated with it, so the 250 is a cash balance. This is your own contribution to 401k, but usually your employer also contributes some money to match your contribution. That match can be recorded as a simple deposit transaction on the 401k account; it also makes sense to define it as a recurring bill/deposit on the schedule page. So the cash balance on 401k account will be increased by a sum of your own and your employer contributions on every paycheck. Once the brokerage serving your account gets that money, they use all of them to buy shares. To track those shares, record Buy shares investment transactions on the 401k account. Once you do that, the cash balance will go back to zero (all the money was used to pay for the shares), but the account will have some investments associated with it and AceMoney will add current value of these investments to the 401k account balance on the accounts page.
ESPP account balance now is 100. Usually the employers buy stock for such plans two times a year. As soon as your employer notifies you that the shares were purchased, record that as a single buy shares transaction and use all the cash accumulated during the ESPP period (again, it usually is six months), so that your cash balance goes down to zero. Later on you can sell shares with Sell shares transaction, it will increase account by the proceeds of the sale and that cash can be transferred to the checking account with a simple transfer transaction
